Monday, March 12, 2012

Chicken Marsala

As I look through the pictures I've taken of the meals I've made recently, I am kind of annoyed because I have only taken pictures all the way through of ONE dish; however, I have 4 unfinished sets of pictures :(. For now, I will obviously post the completed one and I may still post some of the others just with less pics. Sorry! It's hard when preparing a meal and you have multiple burners going, chopping up some veggies, to stop and think to take a picture, haha!

Anyway, this one is a meal I made because Sal said he would love to have it...chicken marsala!!!

This recipe is very quick and quite easy! It looks a lot more impressive than the work it requries, which is always nice. ;) The only thing about this recipe that may be a little off-putting is the spice mix you make to apply to the chicken. I had to buy a few spices I didn't own, but personally since I enjoy cooking it's good to build my spice collection for future dishes! What I am going to list below is made in bulk for uses beyond this recipe. Right now I have the left over sitting in a jar for future use and if you personally know me or live by me, let me know and I can share some with you if you're interested in doing this recipe!

Ok, so let's get started. What you need:
  • 1/2 cup all-purpose flour
  • 1 tablespoon spice mix (listed below)
  • 2 boneless, skinless chicken breasts cut in halves (vertically, not horizontally)
  • 1 tablespoon olive oil
  • 4 tablespoons butter
  • 3 cups sliced mushrooms
  • 3/4 cup Marsala cooking wine (found near vinegar in your local grocery store)
  • 1 cup chicken stock (found near soups)
  • salt and pepper
  • optional: chopped chives for garnish

Spice mix (called Essence, made by Emeril Lagasse):
  • 2 1/2 tablespoons paprika
  • 2 tablespoons salt
  • 2 tablespoons garlic powder
  • 1 tablespoon black pepper
  • 1 tablespoon onion powder
  • 1 tablespoon cayenne pepper
  • 1 tablespoon dried leaf oregano
  • 1 tablespoon dried thyme

Directions:

All the spices for the rub (not pictured: salt!)
 1. I started by combining all of the spices in a jar, shaking well to mix them up.
The spices in my jar all mixed together.
 2. Cut your chicken breasts in half and pound them down (tenderize) so they are quite flat and the same thickness across. (This is because we're frying them and you want everything to cook evenly).

looks nasty! I also cut off the fat (the white, goopy stuff on the raw chicken)
3. Mix the flour and a tablespoon of the spice mix in a shallow bowl or small plate.

4. Take the pieces of chicken (one at a time) and put them in the flour-spice mix, covering the piece completely with the mix. Set aside. Do this for all 4 pieces. This process is called "dredging".

5. Heat the oil in a large skillet over medium-high heat until very hot (but not smoking).

6. Add 1 tablespoon of butter and cook the chicken breasts until golden brown on both sides. I cooked each side for 3 minutes.
just added the chicken
Other side, finishing up!
7. After the chicken has cooked, remove to a plate and set aside.

8. In the same pan add 1 tablespoon of butter and add the mushrooms.
pick any kind of mushrooms you like...I chose a mix!
 9. While the mushrooms are cooking, continuously stir them around so they don't burn. They are ready when the edges are golden browned. (You can test taste to see if they are cooked.)

10. Add the Marsala wine and bring to a boil. Since the wine has alcohol, it will "burn off" so the liquid amount will reduce almost by half after a few minutes. Stir during this time. You'll see some black/brown specs, this is normal and correct!

11. At this point, add the chicken stock and cook for about 3 minutes until the sauce thickens a little bit.

I did not buy enough mushrooms, so your pan will probably look more full!
12. Lower the heat to medium (it should have been at medium-high the entire time up to this point) and return the chicken breasts to the pan. Continue to cook until they are cooked through and the sauce is a little more thickened (5-6 minutes). Remember, the chicken is cooked through when it is no longer pink, the juices run clear, and the chicken is kind of "stringy" looking.

13. Swirl in the remaining 2 tablespoons of butter, add salt and pepper to taste. You may garnish with chives and serve immediately.

I did not garnish with chives.
And there you have it! Chicken marsala dish. It is great served over a bed of rice or noodles.


-------------------
Source: I found this recipe from Food Network.com and take no credit in coming up with it for myself!
Recipe from "New New Orleans Cooking", by Emeril Lagasse and Jessie Tirsch. Published by William and Morrow, 1993.

Tuesday, February 28, 2012

Apologies...made up for with bacon

Alright, sorry I haven't made a post in probably months (I'm afraid to even check). I continue to make new dishes and desserts, but to be quite frank, I have been too lazy and/or too forgetful to post and go through the picture-taking process. I plan on stepping it back up, though.

Although this isn't a recipe, I will post a nice little tip.
Ever tired of the bacon grease mess? Well, there's a nice way to avoid all of that... (or at least MOST of it, heh):

Bake your bacon!

I bet some may be skeptical, but I promise it's just as good as--or even better than!--pan cooking. All you need is:
-bacon
-an oven
-some aluminum foil
-a flat baking sheet
-a metal cooling rack (I bought one for $5 from meijer specifically for bacon, haha!)
-patience to check the oven

(click images to enlarge)
before I put them in the oven

about 10 minutes in

BLTs for dinner! (totaly cook time ~16 m)

So all you do is...
1. Line the baking sheet with the foil and curve up the edges to create a "grease trap".
2. Then set the cooling rack on top.
3. Place your strips of bacon on the cooling rack, and there you have it! This will cause the bacon to crisp up, the grease to fall down through the rack onto the foil.

4. Place the baking sheet (plus the stuff piled on it) in the oven.
5. Set the oven to 400 F (do NOT preheat!!!)
6. Bake for 12-20 minutes. This all depends on how crispy you want your bacon, etc. So keep an eye on it.

When you remove your bacon, you can just carefully move your cooling rack to the sink and fold up the aluminum foil (with all the grease) and throw it right into the garbage! It's quite a simple clean up. The cooling rack will be a little greasy, so you'll have to wipe that down, but at least it's not all over your stove top and YOU, haha :)

This is very nice way to cook a lot of bacon at once. I am using a small rack and have 16 pieces on there at once!

Notes:
-As a warning, don't get discouraged if the first time you try this you over-cook your bacon. Just take down the time you took your bacon out and do it a little shorter the next time.
-You'll hear the bacon begin to crackle around the 10 m mark (at least that's when I hear it). Don't be freaked out, this is normal! Just the fat bubbling away...
-Like any way you cook bacon, leave a little bit of room in between the strips when you lay them out so they don't get stuck together.

ENJOY!
Ron Swanson (from the TV show "Parks and Rec") eating a bacon-wrapped turkey leg, lol!

Sunday, January 8, 2012

Chicken Teriyaki

I don't know about you, but whenever I see teriyaki sauce (for marinating chicken or steak) it's always extremely thin/watery. Therefore, I developed my own sauce (from a combination of different recipes) that thickens nicely (glaze-like) and has excellent flavor. It's very easy to make and tastes great on chicken, placed over a bed of rice (which is what I always make with this)!

Prep time: 30 minutes
Cook time: 40 minutes
Servings: 2

Ingredients:

  • 2 tsp cornstarch
  • 2 tsp cold water
  • 3 tbsp light brown sugar
  • 2 tbsp white, granulated sugar
  • 5 tbsp soy sauce
  • 2 tbsp and 2 tsp apple cider vinegar
  • 2 cloves garlic
  • 1/4 tsp ground ginger
  • 1/4 tsp ground black pepper
  • 2 chicken breasts (I cut the excess fat (white junk) off before I bake)


    All of the ingredients, except for the chicken.
    Often things you have at home that you use for many recipes!

Directions:
  1. In a small saucepan over low-medium heat, combine the cornstarch, water, sugar, soy sauce, vinegar, garlic, ginger, and pepper. Let simmer, stirring frequently until sauce thickens and bubbles.
    All of the ingredients added into the pan, stirred up and on low heat.
    Bubbling, turn the heat down, and it will thicken.
  2. Preheat oven to 375 F.
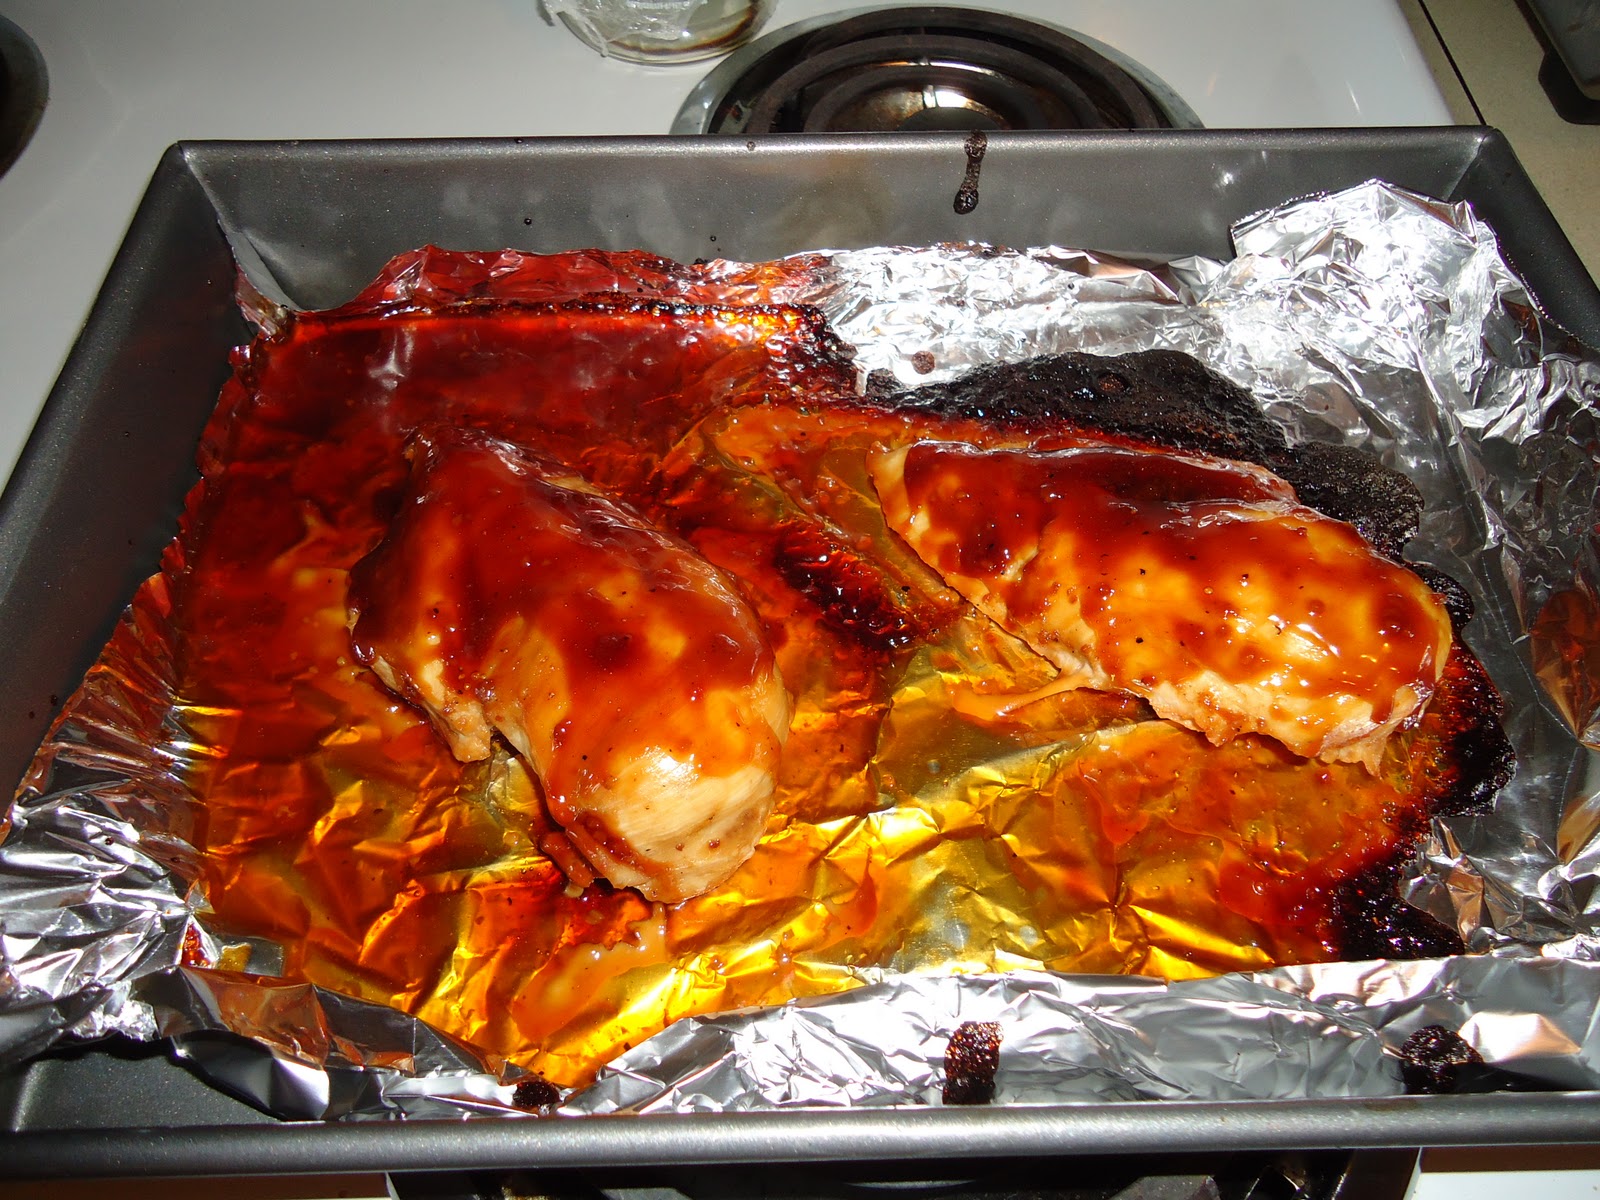
  3. Place chicken in baking dish (I use a 13 x 9 cake pan) lined with aluminum foil. Brush both sides of the chicken with sauce.
    The chicken all trimmed of fat and ready to bake!
Add a layer of teriyaki. You'll want to do this over the course of the bake.

4. Bake in the preheated oven for 40 minutes, until no longer pink and the juices run clear. Brush with sauce every 10 minutes during cooking: 25 minutes covered with foil, 15 minutes uncovered.
5. Remove chicken from oven and allow to stand for ~10 minutes so juices remain within the meat.


Note: This sauce is JUST enough for two. You may want to alter the amounts if you find it isn't enough sauce for your liking. The sauce will "melt" off of the chicken, so you can use your brush to sop up some of this and reapply it to the chicken.

Using the foil is important because it allows for a VERY easy clean-up. Otherwise, the over-run sauce will burn onto the pan, making it difficult to scrape off.

Tuesday, January 3, 2012

Banana Bread

This is a recipe I got from my mother. It comes from an old, tattered, yellow-paged, batter-stained book. It's a huge hit with anyone I've shared it with and it's so easy! It has tons of modifications you can make to suit your style and taste.

Ever buy a bunch of bananas and you can't finish them before they turn brown? Perfect! Throw them in the fridge until you're ready to make some bread. It's okay if they are fermenting, they work perfectly in this recipe. This bread is extremely moist and dense. A great treat if you're a fan of this bread!

Prep time: 30 minutes
Cook time: 45-60 minutes
Servings: 1 loaf

Ingredients:
  • 1/2 cup butter (one stick)
  • 1 cup brown sugar (packed down)
  • 2 large eggs
  • 2 cups flour
  • 1/2 tsp salt
  • 1/2 tsp baking soda
  • 1 1/2 cups mashed bananas (about 4 medium-sized bananas; better if they are a little older/extra-ripe)
  • optional, ~1/2 cup: chocolate chips, walnuts, blueberries, and/or etc. I will be using chocolate chips!
The only ingredients you need! :)
Loaf pan

Directions:
  1. Cream the butter and sugar.
    If you don't have an eletric mixer, I strongly advise you soften the butter
    (let it sit out to room temp) before mixing!
  2. Add the eggs and beat well.
    Starting to look creamy! Mmmm!
  3. Combine the dry ingredients and stir into creamed mixture alternately with the mashed bananas.
    This is what the old, brown, fermented mashed bananas
    look like...not very appetizing :-P
    All ingredients mixed except the 'chips!
  4. Fold in the nuts/chips/etc last.
  5. Pour into a buttered or nonstick loaf pan, let stand at room temperature for 20 minutes, and preheat your oven to 350 F.
    Everything mixed in, just sitting for 20.
  6. Bake in the over for 45-60 minutes. Keep an eye on it, and stick a small knife or probe down the center to make sure it is fully baked (stick should come up clean, not wet with batter).
    Finished! In the pan...
  7. Set the pan on a cooling rack for about 10 minutes. Then use a knife along the sides to loosen it and flip over to get the loaf out. Slice, and enjoy! 
    ...and out of the pan!
I like to put butter on mine and then wash it down with a glass of milk!

Awwww yeahhhh


Source: I will have to edit this post later and add the book I based this recipe off of. It's the basic idea, just a few minor adjustments my mom made.

Monday, January 2, 2012

French Onion Soup Gratinee

First things first: Happy New Year!!!

Sorry it has taken SO long to update. December was a crazy month...with my prospectus presentation (I passed with flying colors, praise God!) and the Christmas season life has been anything other than "slow". My husband and I have been running around a few states the past 2 weeks and tonight was honestly the first night we got to sit down and I make something new in quite some time. I finally got around to the French onion soup I've been meaning to make. Sal requested it a while back. I will just dive in...

A few things to note:
-You need to have some type of oven-safe bowls or (small) containers to broil the cheese at the last step.
-This recipe looks daunting by the ingredients and steps, but I PROMISE you it's not as hard as it seems. I think part of the reason I have not cooked this soup yet is just because I was scared of it! haha
-It does require quite a few different ingredients, but these are good things to have in your pantry for other home-made dishes.
-If you are inexperienced in making a soup like this, give yourself a little more time than I have listed to account for planning/prep/thinking.

***I have listed the recipe I followed...although I do have a minor future adjustment to make. The one posted below turned out great, nonetheless. I just thought I would post my first run-through.

This makes about 4-6 servings (1 serving = 1 hefty bowl!).
Prep time: 15-20 minutes
Cook Time: around an hour

Ingredients:
  • 4 tablespoons butter
  • 1 teaspoon salt
  • 2 large, red onions--thinly sliced
  • 2 large sweet onions--thinly sliced
    Butter and onions

  • 48 oz chicken broth
  • 14 oz beef broth
  • 1/2 cup red wine (cooking wine)
  • 1 tablespoon Worcestershire sauce
    Main soup ingredients
  • 2 sprigs fresh parsley (I didn't know what a "sprig" was, so I just ripped off a few branches and threw it in the pot, haha)
  • 1 sprig fresh thyme (I didn't have fresh thyme, so I used just a few pieces of dried)
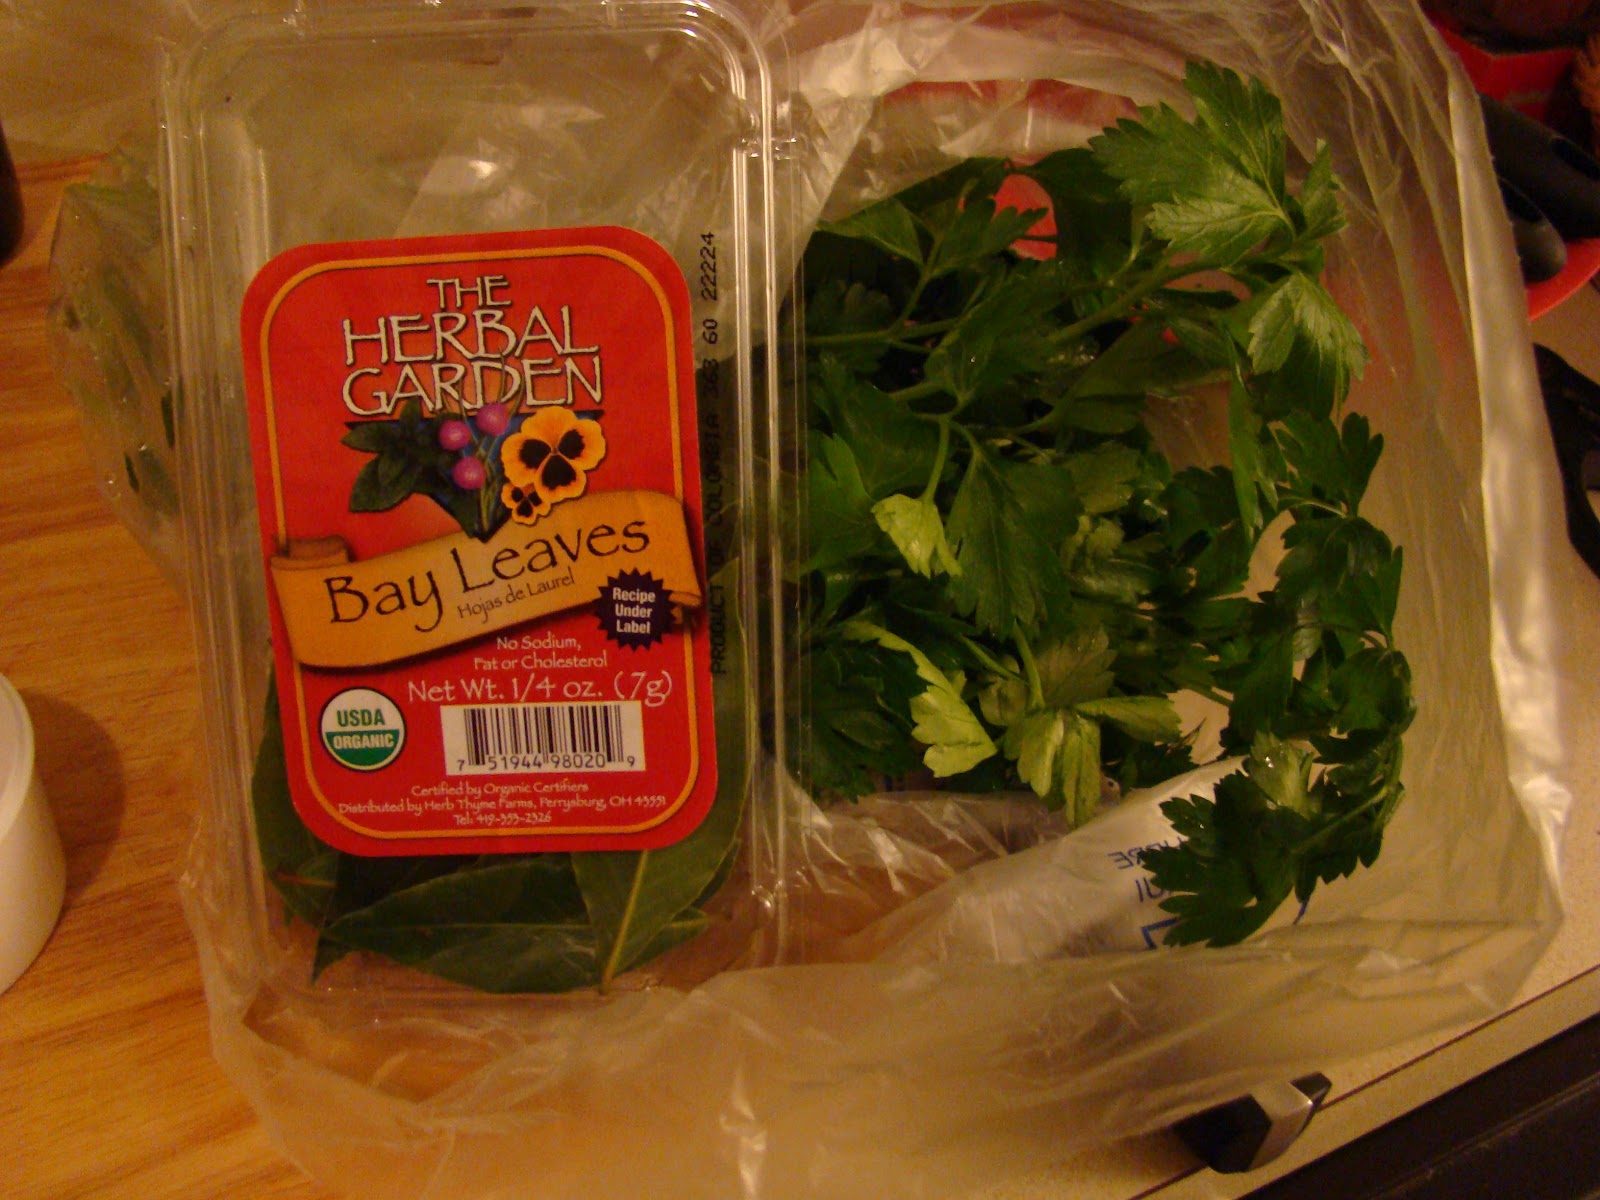
  • 1 bay leaf (had to buy an entire pack just for one leaf which was kind of irritating, but you can freeze the remainder for future soups/stews
    Bay leaves and parsley (dried thyme not shown)
  • 1 tablespoon balsamic vinegar

  • salt and ground pepper to taste
  • a loaf of French bread
  • Gruyere cheese (pre-sliced would be nice/faster)--need a thin layer to cover your bowl. so you'll have to judge the amount by the size of your dishes
  • shredded mozzarella cheese (amount determined same as above)
    Swiss Gruyere from local market (Trentwood Farms), shredded mozz and bread!
  • 4-6 pinches paprika (optional)

Phew! Got done with that list. Keep reading! Don't be afraid! ;) :D

Directions:
Attn: This is obvious, but be sure to be very careful when handling hot items...the baking sheet, the bowls that go in the oven...the broiler is hot and oven burns are nasty!
  1. Melt butter in a large pot (I used a wok, you need quite a bit of mixing room!) over medium-high heat.
    Medium-high!
  2. Once the onions are thinly sliced, stir in salt, red onions, and sweet onions. Cook 35 minutes, stirring frequently until onions are caramelized. What this means is that your onions are going to get really soft, browned, and gooey.
    Sliced...
    Added to melted butter and salt.
    Starting to brown.
    "Caramelized."
  3. Mix chicken broth, beef broth, red wine, and Worcestershire sauce in with the onions. 
  4. Add fresh herbs (parsley, thyme, bay leaf). Simmer over medium heat for 20 minutes, stirring occasionally. 
    (I added the onions after I mixed the other ingredients)
  5. Remove and discard the herbs.
    Soup is all ready! Now just cheese and bread! The milky look at the bottom of the pot is just the flash reflecting off of the steam.
  6. Reduce heat to low, mix in vinegar and season with salt and pepper. I would only add a little bit of salt and pepper if any because there is already a lot of salt in your broths and what-not. Do this according to personal taste!
  7. Cover and keep over low heat to stay hot while you prepare the bread.
  8. Preheat oven broiler. (Do you know how to use your oven's broiler? Check the manual or the bottom of this post for the way it works with my oven.)
  9. Cut your French bread into decently thick slices, I would say 1-1.5 inches. Arrange on a baking sheet and broil 3 minutes, flipping after 1.5-2 minutes. Make sure the bead is well-toasted on both sides. Remove from heat (but do not turn off the broiler!).
    You want your bread pretty crispy because it'll get soft in the hot soup. :)

  10. Arrange your oven-safe bowls on a baking sheet. Fill each bowl 2/3 full with hot soup. Top each bowl with as much bread as you want...my bread was small, so I put four slices in each bowl.
    Soup in bowls...
    Bread on top...
  11. Make a Gruyere cheese layer over the bread and soup.
    I had a thin block, so my slices weren't very neat. Doesn't matter!
  12. Sprinkle some mozzarella over the Gruyere. This will give you that stretchy-cheese when you're taking scoops of your soup. :) 
    All ready for the broiler!
  13. Then you may add some light sprinkles (a pinch!) of paprika on top to finish it off.
  14. With the bowls on the oven sheet, broil about 3 minutes--you'll need to keep an eye on it. For some ovens it may be more or less time, it also depends on how high/low the rack in the oven is. Anyway, you know it's done when it's all bubbly and golden brown on top!
    Browning :)
  15. And you're done! Eat and enjoy!
    Finished soup...delicious!
    A picture of Sal's second bowl, half-way done.

It sounds a little technical, but I promise you it's much easier than you'd think. Sal said he gave it a 5 out of 5! The one suggestion he made is that I switch the amounts of beef broth and chicken broth so that it was more beefy because this is the way it usually tastes. But once again, it's a matter of preferences. It was still really great by following the recipe listed.

Bon appetit!

Source: http://allrecipes.com/recipe/french-onion-soup-gratinee/detail.aspx
-------------------------------------------------
Using the broiler:
Obviously all ovens are different, so understand how to use yours before attempting broiling. My oven is a Whirlpool, electric. These are just instructions on how I use my broiler. Broilers are "direct heat" used to cook meats and brown cheeses (gratinee!). In my electric oven, this consists of the heating element/coils at the TOP of the stove that intensely heat up to scorch the top of the food. A lot of people will use this when they don't have access to a grill. I've used this for baby-back ribs and cheeses, thus far.


So anyway, to broil:
I set my oven knobs both temperature and type (meaning baking, broiling, etc) to "broil". I wait for it to heat up and then place in the food item. My oven says it is important to keep the oven door partially open while broiling (most ovens are able to hold a door open a few inches before closing). It's usually a quick process, so you'll want to keep an eye on your food while it's cooking.
And that's it...it's nothing too special or different. I am just posting this because when I first read about having to broil something a few months ago, I really had no idea what it meant!
If you have more questions, feel free to ask or google search "what is broiling" or "how to broil". I'm sure you will receive good answers. :)